
Phantom 4 RTK: Creating Flight Paths
Creating flight paths on the controller using the built-in app (DJI GS RTK app)
Creating flight paths by importing a KML from Google Earth [VIDEO]
flight paths Using Built-in app

Below are the recommended procedures for creating flight paths using the Phantom 4 RTK and its built-in mission planning app.
Power on controller and aircraft
Hit plan
Select “Photogrammetry 2D”
Zoom in to your desired location
Tap the screen to drop a boundary point, repeat as necessary to create a shape which will auto populate with flight lines.
Type flight height (it is in meters so be aware of that)
Tap “advanced settings”
Set the overlap to 75 for both front and side
Set margin to 15 m (or use the auto margin function and examine if the flight lines suit your needs)
To change the orientation of the flight lines, drag the yellow button left or right
To change the start and end point, tap the start or end point
Hit save and save again, name task and enter details about project
Click “invoke” to enter DJI app to fly mission
flight paths Using Google Earth
Importing KML boundarIEs to create Flight Path
This video shows you how to use KML files from Google Earth to plan missions for your Phantom 4 RTK.

Create KML boundary in Google Earth Pro (use polygon tool or ruler tool to create a polygon)
For linear mission planning, repeat the same steps, but with a path instead.
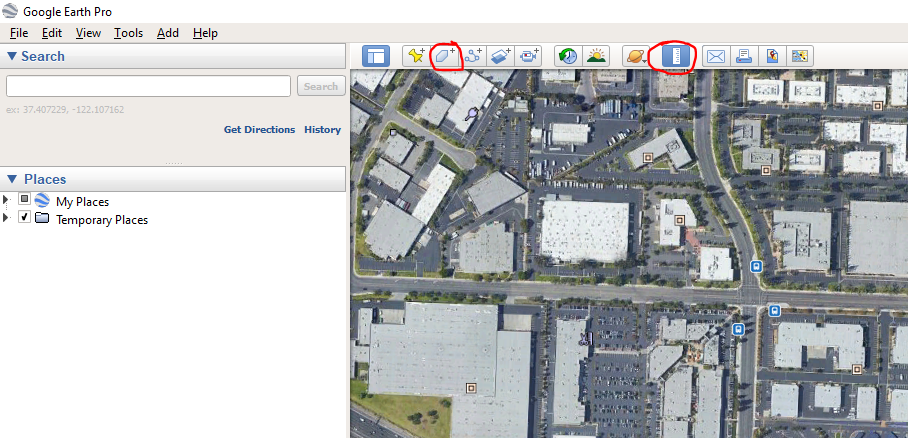
After created, right-click on polygon (left-hand side of the screen) and Save Place As (kml file)

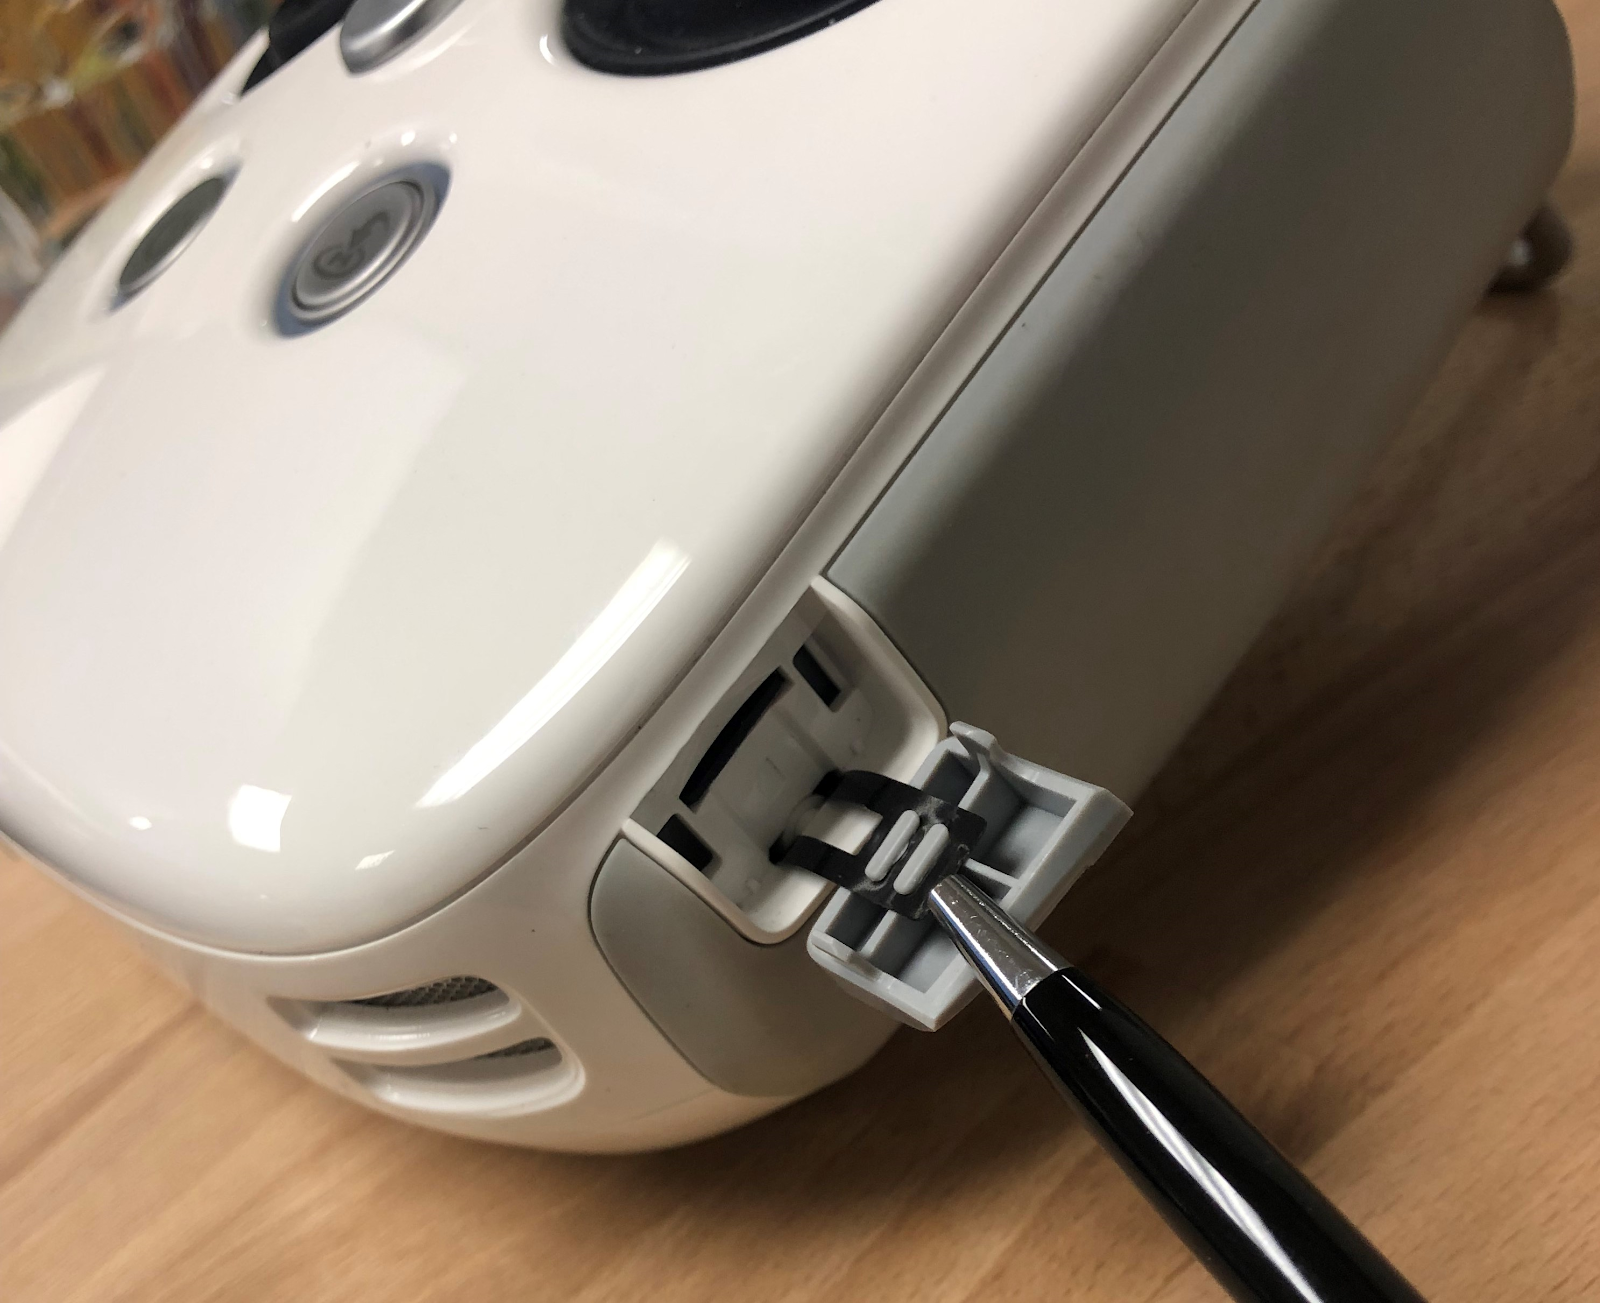
Take your SD card and create a "DJI" folder
Within the "DJI" folder, create a "KML" folder
Place your KML file within the "KML" folder

Transfer the microSD into the controller (lower right side, small gray door)
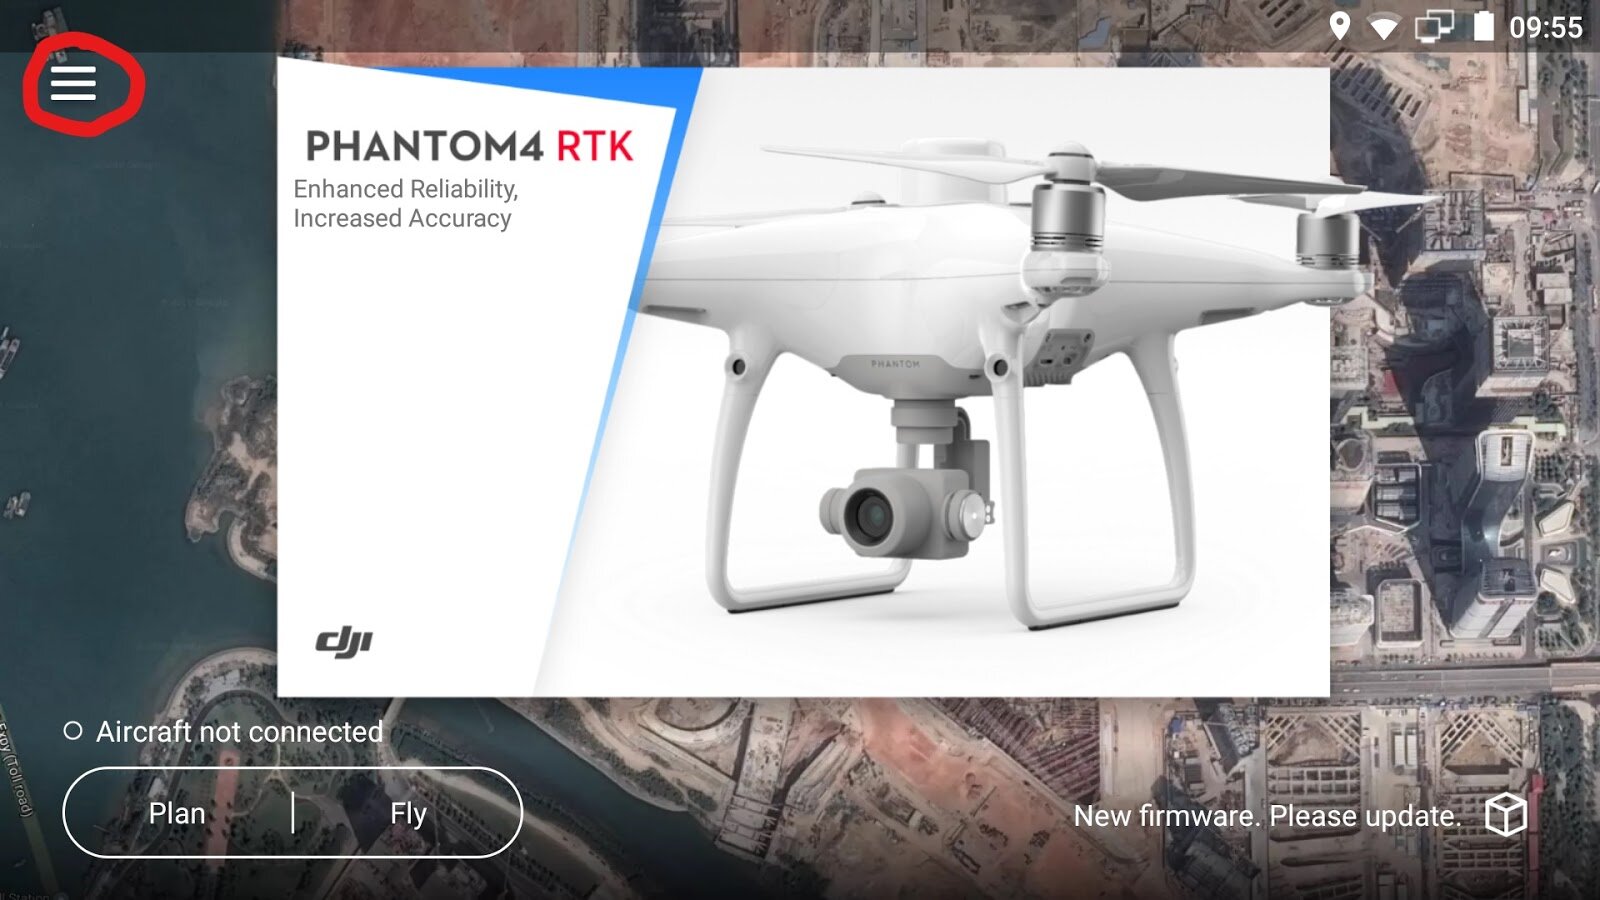
Power on the controller
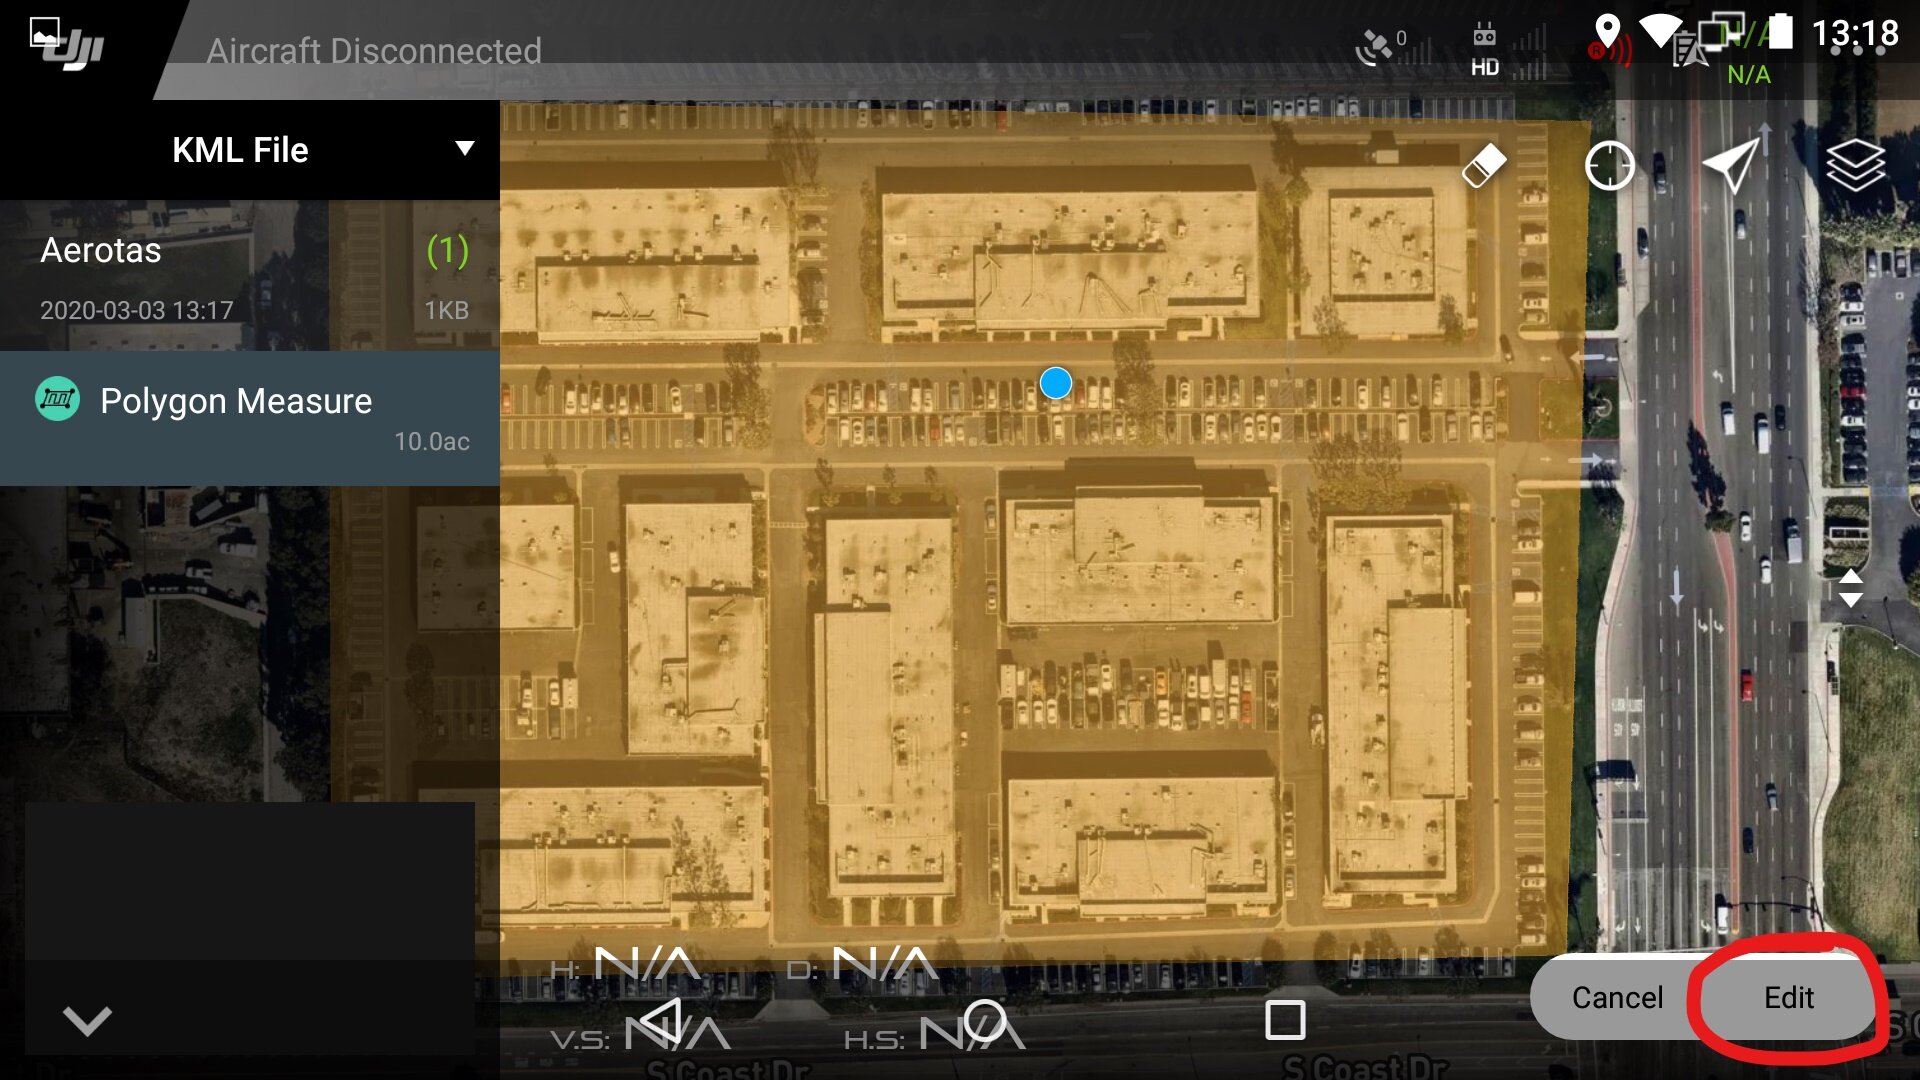
From the home screen tap the 3 lines in the upper left hand corner
Tap the SD card logo in the lower left and select KML for import

Tap the middle dropdown tab and select, "KML file"
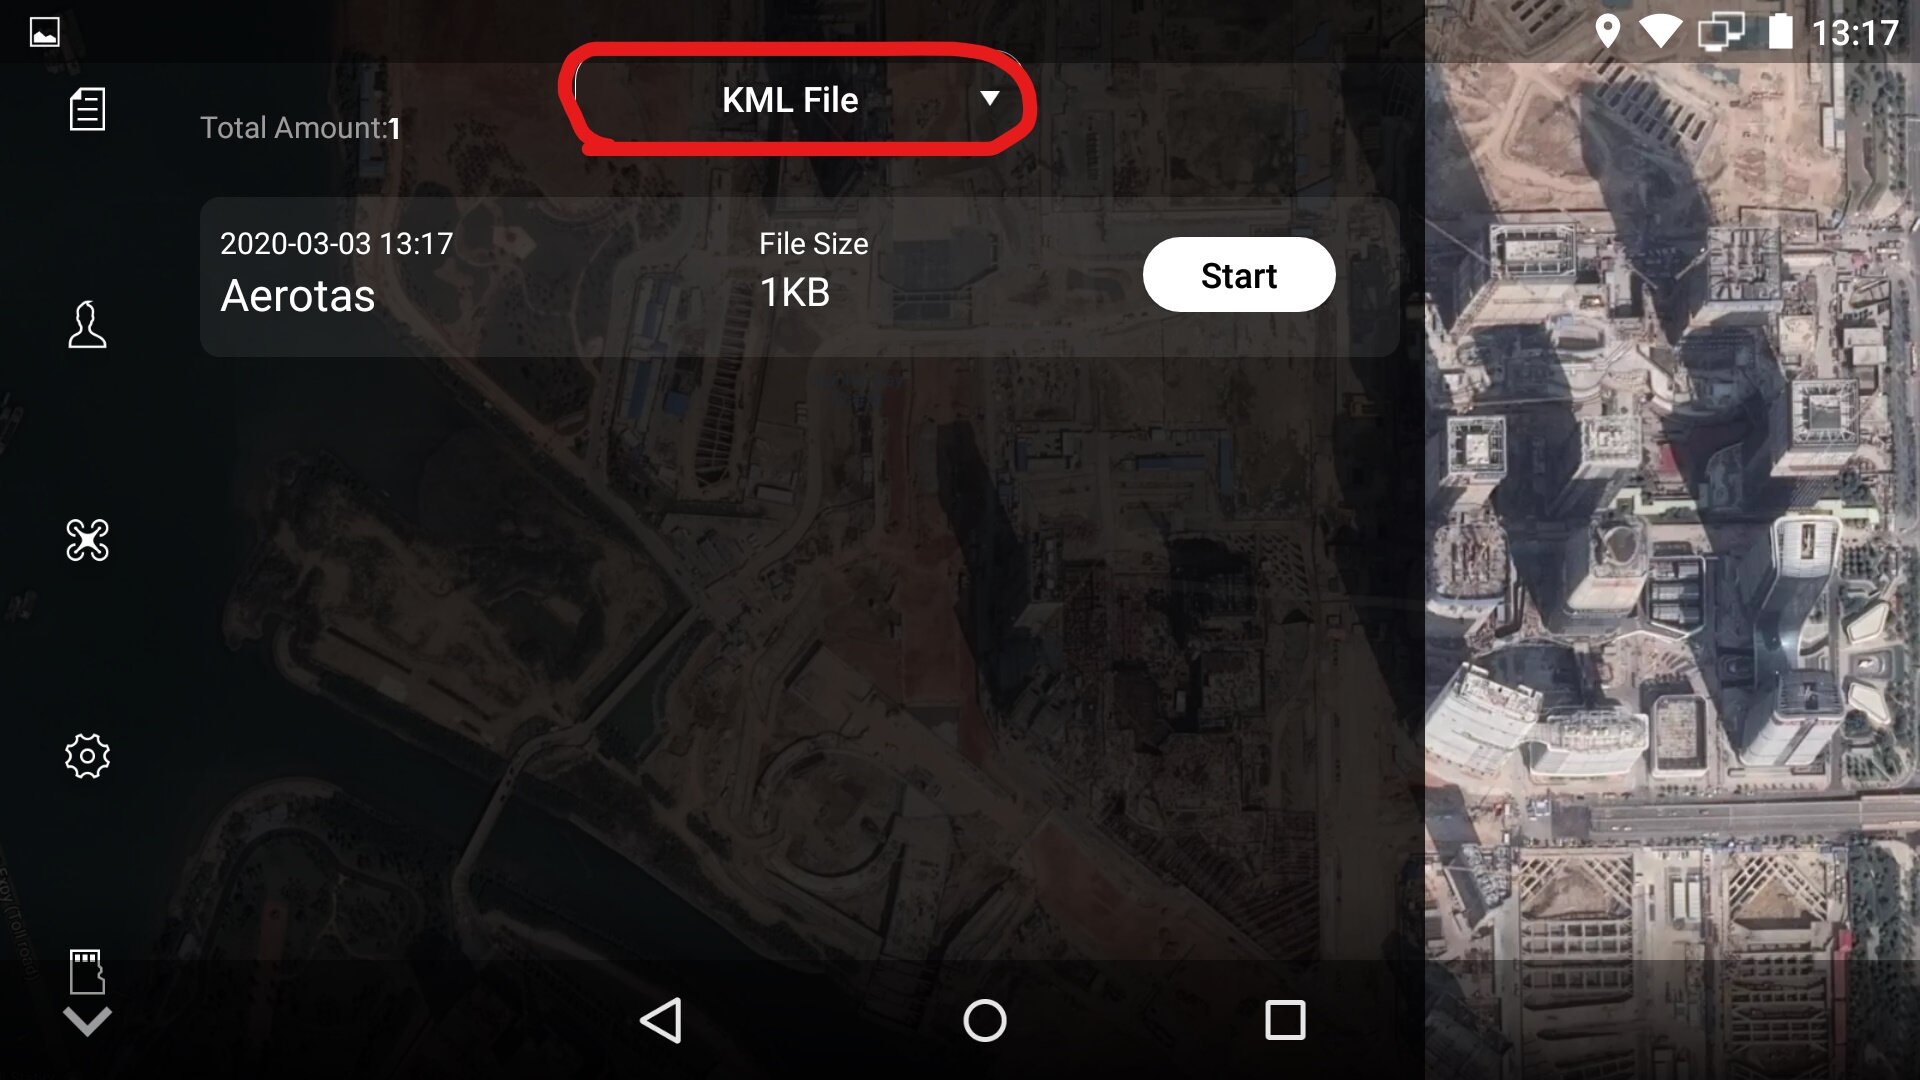
Tap “Start”

This will open the plan screen, tap "Edit" in the lower right-hand corner and select "2D Photogrammetry"

Now adjust your flight parameters to your needs.
